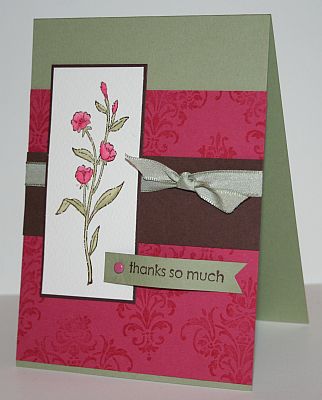
Wednesday, September 1, 2010

2010 - 2011 Idea Book and Catalogue is released


And it's GORGEOUS!!! It contains 60 new stamp sets, 7 new amazing punches, Lots of ribbon, Beautiful new DSP, Lots of Big Shot Accessories, Our new Colour Palette, A new set of In Colours (And we get markers now!!!!) Stacks of new accessories, Oh I could rave on and on I'm so excited.

If you would like your copy contact me (email, phone, or msg is fine) and I will mail you one out for $15 (Thats a bargain) or you can pick one up from me. Please get in quick as I only have a few left they are selling like hotcakes.

Can't wait to get it in your hot little hands? View it online here or download your copy here.

I'll be back soon with lots more to show you!

Dani

Monday, August 30, 2010

New Catalogue Sneak Peek

Guess What Folks.... ONLY 2 MORE SLEEPS!!! And then we have a beautiful new catalogue with stacks of great ideas and beautiful stuff! So how about a sneak peek at one of the new sets??? Ok why not!

Here's a card I made using a new set called Contempo Christmas. It's super stunning and great for beautiful christmas cards. Here's a simple card I made using non traditional colours. These colours look stunning together too. I used the rock and roll technique on the ornaments and have also jazzed them up with some dazzling diamonds if you have a really good look!


Stamp Set: Contempo Christmas
Ink: Baja Breeze, Certainly Celery, Basic Grey
Cardstock: Basic Grey, Certainly Celery, Baja Breeze, Whisper White
Accessories: Ornament Punch, Hemp Twine, Mat Pack, Two Glue Pen, Dazzling Diamonds, Dimensionals


Contact me today to order your copy of the new catalogue or to host a workshop. Free catalogue for hosting a workshop (rrp $12.95).

Thanks for looking,
Dani

Friday, August 27, 2010

Fathers Day Is Just Around The Corner....

Hi guys,

Hasn't this year flown? Fathers day is in just a few weeks and if your anything like me your thinking eeek only 2 more weeks to get something for the hardest person to purchase for! Well I decided on my weekend away last weekend to get at least a start on a card for my dad. My dad is very simple, doesn't like anything over the top and likes fairly muted colours. Ie. His favourite colour is grey! Haha!

On the weekend away we were given the following colours to play with Kraft aka Crumb Cake, Baja Breeze, Very Vanilla, Basic Grey and Soft Suede. I would never put these colours together normally but thanks to the keen eye of Stampin' Up we have Designer Series Paper in the new catalogue in these colours and they are gorgeous. These cards are perfect muted colours for my dad so I made a card for my dad a father's day card using these colours and a stamp set I don't own but have eyed off since it appeared in our current catalogue. Here's the Clean and simple card I came up with...


Can you guess which stamp set it is?? Surely it can't be Teeny Tiny Sentiments haha! I seem to be using that set on every card I make recently, maybe I need to challenge myself NOT to use it! It is Circle Circus. This set is great and so versatile and is fab for whipping up masculine cards! So can you guess what set I'm getting my hands on soon? Haha!

Stamp Set: Teeny Tiny Sentiments, Circle Circus
Cardstock: Baja Breeze, Kraft/Crumb Cake, Basic Grey, Very Vanilla
Ink: Baja Breeze, Basic Grey, Soft Suede
Accessories: Mat Pack, SAMJ, 1/2", 3/4", 1", 1 1/2", 1 3/8" Circle Punches


Thanks for looking,

Dani

Tuesday, August 24, 2010

Team Weekend Away Swap

Hi guys,

Sorry for my quietness the last few weeks. I have been very busy and also have had a few problems with editting my photos lately. If anyone has any tips on good programs to use for photo editting please let me know.

So what have I been up to? Well Apart from celebrating my birthday last week, Celebrating Karls this week and also having alot of health issues going on I got to go away last weekend on my annual Inklings Team Weekend Away. This year baby free which was lovely. I had a blast creating with some really talented ladies, getting lots of inspirational ideas, lots of laughs, yummy hot chocolates, no cooking or cleaning, and lots and lots of Stampin' Up product! Was heaven! So I have alot to share with you. Firstly I thought I'd share the card I made for my Card in a Box swap. I wanted to do something fun and different and came up with this gorgeous card. What do you think??


I used the reverse masking technique to create the border of whisper white. I then embossed the tree image from 'Lovely as a tree'. I then masked the moon with a post it note. I sponged the inside of the rectangle with sponge daubers in Night of Navy and Bashful Blue ink. I prefer to use sponge daubers to create this look but you could use whatever you like. Ie. Brayer, sponges, etc. I find rubbing your sponge daubers gives a more even colour and stops you from getting circle patterns from the daubers. I like to work from the middle out to blend the colour. And I like to use lots of colour. The more colour you use the better the effect (in my opinion anyway). If you would like anymore details on this card or would like me to do a tutorial please comment and let me know.

Stamp Set: Lovely as a Tree, Teeny Tiny Sentiments
Ink: Bashful Blue, Night of Navy, Versamark
Cardstock: Whisper White, Night of Navy, Bashful Blue
Accessories: SAMJ, Clear Embossing Powder, Embossing Buddy, Heat Tool, 1 3/8" punch, Bashful Blue grosgrain ribbon, mini glue dots


Thanks for looking, Please come back soon to see what else I made over the weekend and get a peak at some new stuff from the new catalogue

Dani

Thursday, August 5, 2010

Last Chance List

Hi guys,

Sorry for taking so long to get this up. As you know the new Catalogue comes out on 1st September. I'M SO EXCITED! To prepare for it's release we have a copy of the Last Chance list which you can find here. The list is long to incorporate the colour renovation and reconfiguration of the punches. If there's something you LOVE on the last chance list and cannot live without you need to contact me to order it as these items will not be available after 31st August. Products are subject to availability so get in early before it sells out.

Also as the new catalogue is released on 1st September I am now taking pre orders of the new catalogue. Order your catalogue today and receive it by 1st September. Catalogues cost $12.95 however book a workshop with me and I will give you the new catalogue for free.

Can't wait to share the beautiful few catalogue with you all
Dani

Wednesday, August 4, 2010

Just Add Ink #28

Woo Hoo! I got to participate in a challenge! This week at Just Add Ink it's a double challenge... Just add a man card using Chocolate Chip, Kraft and Baja Breeze! Stunning colours but what to do with them? Any card maker will agree that men's cards are ALWAYS the hardest so I wanted to do something different. I remember seeing a tutorial by Rachel Capps on how to do a Punch Art electric guitar. So I tweaked her tutorial slightly to make an acoustic guitar. This is what the final product looked like...


Stamp Sets: Sanded, Teeny Tiny Sentiments
Ink: Chocolate Chip
Cardstock: Kraft, Chocolate hip, Baja Breeze
Accessories: 1 3/8" circle punch, 1 1/2" circle punch, 3/4" circle punch, word window punch, large star punch, sponge daubers, pewter brads, non SU silver thread


Thanks for looking
Dani

Tuesday, August 3, 2010

Fun with embossing

Hi guys,

Sorry for being so quiet over the last week or so. Things have been busy. Over a week ago I had my downlines over for the afternoon for some stamping. I wanted to show them some techniques and other things you can do with embossing rather than just embossing an image. It was also about giving them ideas and tips so they can share these fun techniques with there customers and add them to there next projects. So we made 3 fun cards. Here they are for you.

Card One - Faux Metal

I love doing the faux metal. The technique is all about building layers and layers of embossing. I generally do 6 layers. It gives you a nice thick image to give the illusion of metal but not so thick that it won't fit into a punch. The biggest tip I can give you with this technique is to work quickly. especially at the last layer. When your ding your last layer you want to have your image already inked up on versamark ready to go. As soon as your last layer has all melted you need to put your stamp on straight away and you need to push it down and hold it there for at least 30 seconds. This will give you a nice and clear image. If you don't get the image right the first time you can add more powder and re heat it to get another layer so you don't loose all the layers you just did. Here's a close up of what the technique will look like at the end...


And here's the card we made. Simple put I really like it. Silver and blues work great together and it's a great non traditional Christmas Card too.


Stamp Set: Season of Joy
Ink: Versamark
Cardstock: Night of Navy, Baja Breeze
Accessories: Heat Tool, Silver Embossing Powder, Big Shot, Perfect Polka Dot Embossing Folder, 1 1/2" 1 3/8" Circle Punches, Scallop Circle Punch


Card Two - Embossing Resist

Probably one of my FAVOURITE techniques. It's lots of fun, gets you nice and inky! This technique involves stamping your image randomly in versamark onto whisper white cardstock. Heating it. Then using sponges or daubers sponging on as many or as little colour as desired. I find this technique is great with kids. They love it. Tips for this technique is using lots of colour. The bolder your colour and the more you use the more the your image will stand out. It also works well with a backgound stamp (such as en francias) stamped first and then embossed over the top.

Here's the card we made. Simple and quirky! I used Wild Wasabi cardstock and ink as I am so excited about its return and wanted to give my downlines a sample with it.


Stamp Set: Priceless
Ink: Versamark, Wild Wasabi, Tempting Turquoise, Elegant Eggplant
Cardstock: Elegant Eggplant, Wild Wasabi, Whisper White
Accessories: Heat Tool, Scallop Square, 1 1/2" Square punch, Sponges, Clear embossing powder


Card Three - Cracked Glass

This technique I've never done before but it's so gorgeous and gives your card something different. It's great for vintage style which is very in atm. So this technique again requires lots of layers of embossing. First you stamp your image and have the whole area cut out and ready to go. Then you emboss layers and layers of clear embossing powder. 6 worked quiet well to give it a really good surface. Once it's done you need to cool it down. I found putting it in the freeze for a minute or so gives it enough cold to give it a nice crack. You then need to crack it as little or as much as possible. Give it a rub over with some darker ink (I used Close to Cocoa) to give it a 'worn' look and it should look a little like this....


And the final card...


Stamp Set: Upsy Daisy, Sanded BG
Ink: Rose Red, Close to Cocoa, Rose Red, Always Artichoke and Regal Rose Stampin' Write Markers
Cardstock: Always Artichoke, Rose Red, Regal Rose, Whisper White
Accessories: Heat Tool, Clear embossing powder, Sponge Dauber, Dimensionals, Hemp Twine, Always Artichoke Brads


Thanks for looking and I hope I've inspired you to use your embossing powder in a different way next time you pull it out!

Dani

Saturday, July 24, 2010

Thank you gifts

Hi guys,

Something I love doing is making little Thank you gifts for my hostesses for having a party. Last night I hosted a workshop for an old friend who I haven't seen in 8 (or so) yrs. She found me on Facebook and started looking at my blog through my facebook page. It was so great to rekindle the friendship and do a great party for her and her mum so I had to make them something extra special and beautiful.

Here's a card and double pillow box gift I made for them.


The beautiful card was made with Friends 24-7. I used one of my much loved colours which will be retiring in September (tear), Mellow Moss teamed up with the beautiful Rose Red and Choc Chip. Such a beautiful combination. Here's a close up of the goodies


The Pillow box was made as a double box by starting with an A5 halved and cut out in the bigshot leaving half of the top tab over lapping so it connects the box and doesn't fully cut it out. I then covered the middle with cardstock so you couldn't see the middle score lines of the box. (I hope that makes sense) Email me if you want more detail. I then put a hot chocolate sachet inside which fit perfectly.


Stamp Sets: Friends 24-7, Trendy Trees
Ink: Rose Red, Chocolate Chip, Mellow Moss, Timber Brown Stazon (Non SU!)
Cardstock: Rose Red, Chocolate Chip, Mellow Moss, Watercolour Paper
Accessories: Mellow Moss Taffeta Ribbon, Aqua Painter, Rose Red Brad, Mini Glue dots, Sticky Strip (for pillow box)


Have a lovely and fun weekend
Dani

Sunday, July 18, 2010

Happy 1st Birthday Ethan

Hi guys,

One of Rileys friends (and sort of boyfriend) Ethan turned one during the week and had his birthday party yesterday so I had to make him a card to go with his present. I was going to go punch arty and make a Winnie the Pooh card cos his mum is a little Winnie the Pooh crazy but I didn't have all the punches I needed so I decided to pull out one of my much loved sets 'Wild About You.' My Spidie senses are telling me this set may retire at the end of this catalogue so I wanted to get a little more use out of it before it does. Here's the card I came up with...


Isn't that colour combo divine? Its' So Saffron, Baja Breeze, Certainly Celery and Basic Grey. I was really happy with those colours! Will be using those again! I have seen Makeesha Byl do that gorgeous ribbon out the side with button attached for a while now and keep meaning to give it a go. After seeing her tutorial this week (found in this post) I was inspired to do it. This is the 3rd card this week I've made with it. It just gives the card something extra. Please note though this card won't fit into an envelope like this though. The button especially makes it to bulky!

Stamp Set: Wild About You, Teeny Tiny Sentiments
Ink: Basic Grey, So Saffron, Certainly Celery
Cardstock: So Saffron, Basic Grey, Baja Breeze, Certainly Celery Prints DSP*
Accesories: 1 1/2" square punch, dimensionals, certainly celery ribbon, Non SU button, Sticky Strip, linen thread


Thanks for looking

Enjoy the beautiful Sunday weather we have today!
Dani

Thursday, July 15, 2010

Inkspirations Challenge #31

Hi guys,

As I stated the other day when I saw this sketch I had another idea I wanted to try. Now I must say I'm not 100% happy with the outcome but still thought the card was cute so I thought I'd share it anyway. Here is the sketch we had to work with...


My team are currently doing a swap using the technique "suspension cards." As I have only ever made one of these before I thought this sketch gave me the perfect opportunity to practice. I am glad I did because there is alot of tweaking that needs to be done before I am 100% happy with it. This card also took alot of work because I haven't replaced all the punches I lost when my stuff was stolen so I cut all the squares for this card with my cutter and not a punch or big shot dye!

Here's the card...


The suspended "bugs and kisses" square spins to reveal a picture on the other side. Here is the card with the other side of the suspension


Too cute huh??? Here's a close up of the suspension mid twist.


Stamp Set: Bugs and Kisses
Ink: Old Olive, Baja Breeze, Riding Hood Red
Cardstock: Whisper White, Riding Hood Red, Baja Breeze, Old Olive, Tangerine Tango, Summer Picnic DSP*
Accessories: Dental Floss, Sticky Strip, Scallop Edge Punch, Tangerine Tango Ribbon, SAMJ, Paper Cutter


Thanks for looking,
Dani

Christmas Stamp A Stack

Hi guys,

With all the Christmas in July stuff happening I thought now would be a great time to get organised for Christmas so I am starting Christmas Stamp-A-Stacks.

What is a Stamp A Stack?
Quick and simple class where participants get to ‘stamp a stack’ of cards in a small amount of time. These cards are usually simpler in design and are great for people of any card making ability. These can be held at my place or yours. Usually make 8-10 cards for $20 but this can be changed to meet needs and time constraints of group needs.

I am holding a Christmas Card Stamp A Stack Class at my place for the next few months leading up to Christmas. The aim is to get all your Christmas Cards made and ready to send out before Christmas rather than cramming them in at the last minute like I often do.
Here are the details of the first one:

When: Friday 30th July 2010
Time: 7pm -9:30pm
Where: My Place in St Marys, Please call 0420 974 200 to confirm your attendance and I will give you my address
Price: $20 for 10 cards, 2 of 5 designs
Please bring your own double sided tape or SNAIL adhesive. Alternatively SNAIL can be purchased from me for $12.95 or $8.50 for a refill.

Any orders placed on the night will have free shipping. Bring along a friend who hasn't attended any of my classes before and get your class half price. Hurry only limited spaces. I will run another one if there is enough interest or get your own group together.

Here is a sneak peek of one of the cards we will be making.


Look forward to seeing you all soon!

Thanks for looking,
Dani

Friday, July 9, 2010

Inkspirations Guest Designer


Hi guys,

I was so super excited this week. The card I made for the Inkspirations sketch challenge (You can find it by scrolling down a few posts of click here) 2 weeks ago won! I never enter challenges with the hopes or thoughts that I will or want to win but merely for the sheer fact that I get to stamp for myself. I also love seeing what other great ideas others come up with. There's so much talent out there! So when I saw my name that I had won I was absolutely blown away! The great thing about winning is you also get the great privlege of guest designing and having your card on Makeesha's blog, Such an honour. Here's the layout I got to work on for my guest design spot


I saw this sketch and was really intimidated at first, I think it was more the prospect of being a guest designer than it being a tough sketch. Once I got going it was really easy to whip up a card. I had a really great and fun card I wanted to do but with the busy-ness of also preparing for the blog hop yesterday and returning to work this week it just didn't get done. Hopefully I'll have a bit of time in the next few days. Here's the card I came up with instead.


I love the cute little cake in this stamp from Greetings 8! If you look closely you'll see the cake icing has a bit of bling. Looks so pretty IRL. I also have been having heaps of fun playing around with ruffling ribbon and different ribbon effects and I just love the cute little ruffled ribbon on this card. Gives it something extra without taking over the whole card.

Also apologies for the crap photo. I took over 40 photo's of it and just couldn't get it right. The sun hasn't been shining here in Sydney this week :-(

Stamp Set: Greetings 8
Cardstock: Chocolate Chip, Pumpkin Pie, Watercolour Paper, Sweet Always DSP
Ink: Chocolate Chip, Regal Rose, Pumpkin Pie, Pink Pirouette, None SU! Timber Brown Staz On
Accesories: Aqua Painter, Chocolate Chip Ribbon, Two-Way glue pen, Dazzling Diamonds, Dimensionals


Thanks for looking,

Dani

Thursday, July 8, 2010

The Inklings Christmas In July Blog Hop


Welcome to The INKlings’ Team’s Christmas in July blog hop. You may have arrived here from Kari Hughes's blog or just be visiting my blog, whichever way once you’ve checked out my creations you can continue the hop through the link at the end of this post to the next team member.

How quick is this year going! Have you started to think about your Christmas cards and projects yet? The INKlings team has and we thought that this month was the perfect time to host a Christmas in July blog hop. You'll find lots of great ideas provided by 17 team members’ fantastic blogs.

Want to win some Blog Candy? Simply leave a comment on each blog and then email Christie Wallace and let her know you’ve done so and you’ll be in the running for a fantastic prize of 17 handmade cards plus other goodies.


Sorry Blog Candy prize not available to SU! demonstrators but you're more than welcome to leave us a comment!

Well I don't know about you but I always have heaps of trouble at Christmas Time finding something to get for some people on my Christmas List who seem to already have everything. I then end up giving them chocolates or a gift card which is a little impersonal. So I thought this year it'd be great to give those people something from the heart. Something handmade. And something they can use. I made a Christmas Stationery Box. Which would be great to give as a gift a month before Christmas as a Getting Read for Christmas Stationery Box. You'll see why...

Here's the box closed with the lid on...


Take the lid off and you get... Oooh Pretty! Everything you could need for Christmas.


There is a bunch of Christmas Cards to give out... (I plan on making more but just didn't get the time this week)


Here's a pile of them


Next there's some cute little love note sized (3"x3") cards to add to presents


And a cute handmade notebook to write Christmas Present lists in, Card lists, Anything you like. I haven't secured it in properly so it can be removed to be written in or kept in your handbag. Please mind my handwritting!


There's also some little gift tags in there which I forgot to photograph, a little spot to put stamps to post your cards and there's also a Pen which wasn't attached when I took the photos. Yes it's been a really hectic week! If you are back on my blog in the next few days you'll find out why! I really hope you enjoy my project and get lots of inspiration to get you Christmas Projects started soon!

Well that’s all from me. Next stop on the INKlings’ Team Blog Hop is Beth Stewart. Have fun and don't forget to leave a comment on each blog to win some great Blog Candy.

Here is a list of all the blogs involved in the Hop just in case you loose your way

1. Christie
2. Dani H

3. Carol
4. Michelle D
5. Jayne
6. Kylie
7. Kari
8. Dani F
9. Beth
10. Nicky A
11. Clare

12. Amy

13. Fiona B

14. Michelle Frost-Stevenson
15. Fiona Poirier

16. Divya Rao
17. Rachel Jackson


Have Fun and hope you get lots of inspiration! And please (regardless of weather your a demo or not) give all the girls some comment love. They have all been working hard to give you some great projects.

Dani

Saturday, July 3, 2010

Stamp Sets For Sale

Hi guys,

I've been going through the stamp sets I own and have decided it's time for a spring clear out. I have over 30 sets going cheap cheap cheap! Please contact me by commenting on this post with your email address (or send me an email) and I will email you a copy of the list of stamp sets I am selling and the prices. My email address is Danielle.fender@gmail.com

I am uploading photo's of the stamp sets and the condition they are in onto facebook within the next few days (My computer gets a little temperamental uploading them all at once). Feel free to add me as a friend and have a browse.

Discounts for multiple purchase will apply. This will also make shipping cheaper.

Thanks, Dani

July Special


This month Stampin' Up are focusing on two-step stamping. A fun technique that takes your projects to a whole new level. They have put a selection of their two step stamping sets 20% off from 1st July - 31st July. No minimum or maximum purchase, so go crazy... Choose any of the following stamp sets.

ItemPageDescriptionRegular PriceSale Price
11638639Loads of Love$39.95$31.96
11634242Big Bold Birthday** $53.95$43.16
11586078A Rose is a Rose** $66.95$53.56
11633286Playful Petals** $52.95$42.36
11577098Cheep Talk $47.95$38.36
115946115Wonderful Favourites $39.95$31.96
11918714*

Tiny Tags (wood-mount)

$38.95$31.16
11859214*Tiny Tags (clear-mount) $28.95$23.16
11916331*Cottage Garden (wood-mount) $32.95$26.36
12000331*Cottage Garden (clear-mount) $24.95$19.96
*From 2010 Autumn-Winter Mini Catalogue
**Retiring stamp sets!

Contact me today at danielle.fender@gmail.com or 0420974200 to learn more about two step stampin' or to purchase any of the sets listed above.

Have a great day,
Dani