Friday, January 28, 2011

Embracing Simplicity

Hey All,

In my last post I advised that I found simpler cards harder to make especially cards with less layers. Well I must have been hit with the Less is more bug cos I managed 2 simple cards that took under 30 mins each to make. AWESOME! They are both similar but hey I am still happy with them especially cos they are BRIGHT and cheerful.


This first one I made for my dad whose birthday it was on Australia Day. He also had surgery yesterday so nice and cheery is definatly on the cards

Stamp Set: Circle Circus, On your birthday
Cardstock: Pear Pizzazz, Bashful Blue, Whisper White
Ink: Pear Pizzazz, Bashful Blue, Marina Mist
Accessories: Marina Mist Button, Marina Mist Taffeta Ribbon, Corner rounder


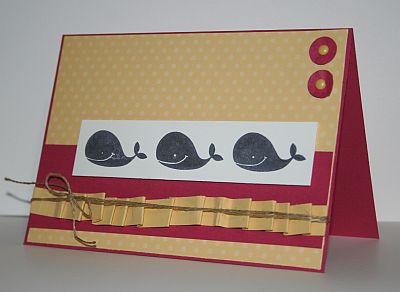
This second one I made to say thanks to our friends for letting us stay at their caravan last weekend. We had the most awesome time. I'm really tempted to buy my own down there now.

Stamp Set: Circle Circus, Trendy Trees
Cardstock: Pumpkin Pie, Daffodil Delight, Rose Red, Whisper White
Ink: Pumpkin Pie, Daffodil Delight, Rose Red
Accessories: Pumpkin Pie Taffeta Ribbon, Rose Red Button, Corner Rounder


Thanks for looking,
Dani

Wednesday, January 26, 2011

Just Add Ink #52

Hi guys and gals,

I've just gotten back from an awesome break away down the south coast. Was much fun and very needed for me to have a bit of a destress. Then to arrive home to this horrible weather, I think I'm going to pack up and move down there. Anyway I got to sneak in a card for Just Add Ink's weekly challenge. This week its a sketch, here it is...


I really love there sketches as they are usually on the more simpler side of life which for me is a challenge to not add 20 billion layers. So I tried not to complicate it this week and embrase the simplicity. I must say I don't know if I LOVE this card yet but please tell me what you think as it's a little bit different for me. Also would love to hear what age group you feel it's appropriate for.


Stamp Set: Grunge Rock, Sanded
Cardstock: Night of Navy, Real Red, Bashful Blue, Whisper White
Ink: Real Red, Night of Navy, Bashful Blue
Accessories: Paper Snips, Top Note dye, Real Red Taffeta, Night of Navy thin taffeta, Rhinestones, Paper Snips


I also find it quiet fitting that I just randomly chose these colours and happened to put it on my blog on Australia Day, How fitting. Trust me, none of it was planned. Happy Australia Day everyone, I hope you all had a great day munching on some snags and sipping a few beers! (I however worked, bah humbug!)

Have a great one!
Dani

Wednesday, January 12, 2011

Just Add Ink #50

Hi guys,

Third post in 3 days! I'm on a roll. Have a very quick card to share with you today. Must admit I'm not 100% happy with it. Few things not perfect on it and I wanted to do more with it but I needed to get it up so I could enter it in time for Just Add Ink's 50th Challenge!!! So here it is...


Stamp Set: Awash with Flowers, On your birthday
Ink: So Saffron, Elegan Eggplant, Ridinghood Red, Pear Pizzazz
Cardstock: Watercolour Paper, Pear Pizzaz, So Saffron, Elegant Eggplant
Accessories: White Taffeta, Aqua Painter, Dimensionals, Vintage brads, SAMJ


Thanks for looking,

Dani

Tuesday, January 11, 2011

One of foxes friends

Hi guys,

Told you I'd be back. So excited that I have had the chance to blog again. I've been feeling a little lost without it actually. I have the other baby shower card to share with you today. This card needed to feature a giraffe and needed to be non gender specific. So what was better than the cute little giraffe from fox and friends? I actually drew some of my inspiration for this card from the catalogue. Best place to get some mojo from when it's lacking


Stamp Set: Fox and Friends, Baby Bundle
Ink: Baja Breeze, So Saffron
Cardstock: Whisper White, So Saffron, Baja Breeze prints DSP from Subtles DSP paper stack
Accessories: Whisper White taffeta, Whsiper White Button, Linen Thread, 1 3/4" circle punch, Dimensionals


I'm not if you can tell but the middle section is adhered to the base with dimensionals. Give the card some more dimension. Now I was a little unsure if this was "gender nuetral" enough or does the baja make it more "boyish". Please let me know your thoughts.

Also I thought I'd share a photo of my gorgeous daughter Riley just because I can. I can't believe how quickly she is growing up. Here she is running around blowing kisses to however will catch them. Do you love her skirt?? I got it specially made as a one off for her by Ilja at Em&Femme Designs for Christmas. I also got the cutest shirt to match with fairy wings on it but she got it all dirty by the time I took this haha.


Have a great one,
Dani

Monday, January 10, 2011

Don't you hate it when....

You have no idea what to title your blog post?? Well that's me today. Possibly because I haven't updated in like 6 weeks and I'm a little out of touch! I apologise for my quietness but things have been pretty crazy in my side of the world. I have been creating and have so much Christmas stuff but just haven't had time to upload it, that and my computer has had issues. I have been working pretty crazy hours in amoungst that we have been very busy with our new adventure which I am hoping to have final information about next week. I also have a new job starting next month which I am very excited about and have just been spending lots of time with my gorgeous little girl.

Anyway onto some of the stuff I've been creating. A friend of mine asked me to make her some baby shower cards for friends who were having baby showers this month. Both needed to be non gender specific and one had to include giraffes. So this is the first one I made...


Stamp Set: Baby Bundle, Teeny Tiny Sentiments
Ink: Marina Mist, Certainly Celery, So Saffron, Pretty In Pink, Chocolate Chip, Basic Grey, Stazon Black
Cardstock: Watercolour Paper, Marina Mist, So Saffron, Pretty In Pink, Certainly Celery
Accessories: Certainly Celery Button, Aqua Painter, Certainly Celery Brads, Large Star Punch, Small Star Punch*, Linen Thread


I must say the photo doesn't do it justice but I don't feel I really do the best photos of my cards.

Thanks for looking. I will be back soon with some more awesome stuff to share.

Happy Stampin'
Dani

Monday, November 22, 2010

Happy Anniversary Hunny!

Hi guys,

On Friday the 19th last week me and Karl celebrated our 5 yr anniversary. I can't believe it has been 5 years since that first date. It's amazing how much has happened and it feels like we've known each other all our lives yet it doesn't seem like time has really gone that quickly.

Anyway enough mushy stuff onto the card I made! This is the card I made for our anniversary. I made it back in August on our weekend away and figured I'd give it to Karl whenever it felt like the right time. And due to how busy things have been I never got around to giving it to him so I thought it was still nice enough for an anniversary.


Stamp Set: En Francias, Short and Sweet, Artistic Etchings
Ink: Basic Black, Ridinghood Red, Versamark
Cardstock: Basic Black, Very Vanilla, Ridinghood Red
Accessories: Ridinghood red taffeta, Scallop circle punch, hemp twine, Sponge Dauber, Sticky Strip, Ridinghood red button, buttons #5 die


To make the flower I punched out 4 or 5 scallop circles in very vanilla cardstock, scrunched them up then unfolded them. To get the inked effected I simply dropped them randomly in my ink pad until they were to my liking. Went around them with a dauber, played with them til they sat the way i wanted, added some accessories and done. Vintage looking flowers!!!

Looking at this card I can see that my style is always changing. It's such a great thing. There are alot of flaws (en francias going side ways, etc) in this card but I think it all adds to the effect.

Hope you like it too,

Dani

Tuesday, November 9, 2010

Dashing Christmas

Hi guys,

WOWSA! 2 posts in one day! Don't fall over in shock! I'm in the middle of 3 days off so I'm on fire with actually getting some stuff done! I got to participate in another Inkspirations challenge! And they have a new home. You can find them here. I must say I am really happy with this card. I got 'Dasher' al a carte stamp set when the catalogue was released on 1st September and sadly this is the first opportunity I got to use it, Let me tell u your going to be sick of this little guy in a few weeks time! I really love how I have layered him with Season of Joy if I do say so myself. I also used 'Dot, Dot, Dot' for the first time. It was my replacement to 'polka dot' bg that retired in August. I really like 'Dot, Dot, Dot' but am not quite in love with it as much as I was 'polka dot' bg. Anyway you let me know that you think. Here is the sketch to use


And here is my card! Aren't the colours great???


Stamp Sets: Dasher, Season of Joy, Dot, Dot, Dot, Short & Sweet
Ink: Early Espresso, Cherry Cobbler, Crumb Cake
Cardstock: Early Espresso, Cherry Cobbler, Crumb Cake, Naturals Ivory
Accessories: SAMJ (Big time), Dimensionals, Very Vanilla Satin Ribbon, Pearls, Round Tab Punch


Thanks for looking. I hope you love this card as much as I do!

Dani

Just Add Ink #42

Hi guys,

Things have been busy busy busy. Between working fulltime, job interviews and being assessed as foster carers I haven't had anytime to myself. I was fortunate enough to make this card the other week for a demo on distressing and brayering and it just happens to fit in with the JAI challenge this week. Here is the sketch for this week...


And here's the card I made


Stamp Set: Just Believe, French Script BG*
Ink: Crumb Cake, Early Espresso, So Saffron, Daffodil Delight, Tangerine Tango, Versa Mark
Cardstock: Crumb Cake, Early Espresso, Whisper White
Accessories: Clear Embossing Powder, Heat Tool, Brayer, Post It Notes, Dimensionals, Early Espresso Satin Ribbon, Distressing Tool, Bone Folder


This one has to be a quick one today. If you have any questions on how it's made please email me at danielle.fender@gmail.com

Have a good one,
Dani

Wednesday, October 27, 2010

Ornament Punch Flowers

Hi guys,

Have you purchased the Ornament Punch? Want to do something more with it then just ornament shapes for your Christmas Cards? Well I have a ripper card to show you using the ornament punch to make a flower. I have also made roses too I'll share them soon. I used the current Just Add Ink colour challenge


Pretty soft tones. Wouldn't usually put these together. I find I don't use Sahara Sand enough and really had fun with it this week. I also slightly modified Makeesha's Inkspiration Sketch to make this card. Here's the sketch...


And here's the card...


Stamp Set: Teeny Tiny Sentiments
Ink: Sahara Sand
Cardstock: Blushing Bride, Pear Pizzazz, Sahara Sand, Bashful Blue
Accessories: Ornament Punch, 3/8" Whisper White Taffeta Ribbon, Word Window Punch, Pinking Heart Border Punch, Tom Bow Glue, 1 3/4" Circle Punch, Non SU Button


I didn't want to do to much with it after I made the flower because I didn't want to draw away from the gorgeous-ness of the flower and I felt it did enough for the card already.

To make the flower I punched out 12 ornaments in Blushing Bride and one in Pear Pizzazz. I faux suede-d the pear pizzazz ornament to make two leaves. You could do the same with the flower (only punching 6 and make 12 once faux suede-d). The reason I didn't was I was having trouble with it at first using my bone folder. It works really well with the scallop circles but not the ornaments. The trick with the ornaments is to scrunch and unfold lots of times to help seperate the fibers. Anyway once they were done punching I scrunched them up (very therapeutic). I then punched a circle to adhere them too. I used tom bow and just layered them until I was happy. I then played with the petals to make them sit how I wanted. I added a button to the middle and the leaves at the back and your done. It also looks awesome as a brooch. I will try my darndest to get my ornament rose up soon also.

Thanks for stopping by,
Dani

Wednesday, October 20, 2010

Just Add Blue

Hi Guys,

This month is Depression and Anxiety Awareness Month. This is a great cause and something dear to my heart as I have gone through this myself and I know alot of people who have struggled in these areas. Please go to www.beyondblue.org.au for further info. Now to celebrate this the Just Add Ink girls have put together a great challenge this week. Just Add Blue and make it a just because card. Ie. Not a birthday, christmas, thank you, etc card a Card for no reason at all. I love that as I keep meaning to make a card like that and always forget. So this was a great opportunity to make something to send to someone for no reason. Here's what I came up with


I love the stamped vines. They turned out fab, I particularly love them because I've used 3 different images from three different sets and they blend in together so well. This card also has a few of my current things i'm in love with... Marina Mist, DSP stack, satin ribbon and rhinestone brads! I hope you like this card as much as me. Now to pop it into the mail for it's unsuspecting recipient!

Stamp Set: Just Believe, Pocket Silhouettes, Great Friend
Ink: Basic Black, Bashful Blue, Marina Mist
Cardstock: Basic Black, Marina Mist, Bashful Blue, Whisper White, Marina Mist DSP Paper Stack
Accessories: Rhinestones, Dimensionals, Basic Black Satin Ribbon, Pinking Heart border punch, SAMJ


Also I wanted to share some photo's of my gorgeous daughter Riley. She finally after months of frustration and encouragement started walking last Thursday. She is doing so well. Here's a photo of her this morning walking across the lounge room.


Now she has a little dressing up obsession atm. Here's a photo of her in her favourite hat (which I'm not in love with but hey) her glasses case around her neck (they are currently broken again) and a cow puppet in her hand. Shes so cheeky!


Hope you enjoyed everything I had to share with you!

Have a great day!
Dani

Wednesday, October 13, 2010

More Pink and More Bling... Sorta

Hi guys,

Just a very quick one tonight as I am very tired after just getting home from an 8hr shift!

Last week we had two deaths occur within two days of each other. So unfortunately I needed sympathy cards. I whipped up this card today and as I was finishing it up I was like if i add a little bling I can sorta enter it in the current Just Add Ink challenge. So I added two rhinestone brads for my bling. Along with the luscious Blushing Bride and I think I just squeezed this one in. What do you think?


Stamp Set: Priceless, Just Because, French Script*
Ink: Pear Pizzazz, Early Espresso Ink pads and markers, Blushing Bride marker
Cardstock: Whisper White, Blushing Bride, Pear Pizzazz, Early Espresso
Accessories: Early Espresso Satin ribbon, Rhinestone Brads - Ice, Dimensionals, SAMJ


Thanks for looking,
Dani

Sunday, October 10, 2010

Just Add Pink and Bling

Hi guys,

This weeks challenge at Just Add Ink is all about Pink Ribbon day on 25th October. The challenge is to Just Add Pink and Bling. If ever there was a challenge for me to slip up on, this would be it. I'm not what u would consider a girly girl and pink usually isn't my thing. Since I've joined Stampin Up and also since the birth of my daughter I have been embracing Pink more and more and I must say I am quiet happy with what I came up with!

A family friend is getting married today (Huge congrats to Brodie and Liz) and so I thought I'd use this challenge to make them a wedding card. Here it is...


I apologise for the photo. I must have taken 50 photo's of the card and couldn't get anything I was satisfied with. Any suggestions are welcomed!

I embossed the heart from Always in black embossing powder and then coloured in the flowers with my aqua painter and Melon Mambo ink. I then added the new rhinestones (You have to get some they are divine) to the flower centers. Here's a close up for you and also so you can actually see the sentiment.


Stamp Set: Always
Cardstock: Whisper White, Basic Black, Melon Mambo, Melon Mambo Prints DSP from Brights DSP Stack
Ink: Basic Black, Versa Mark, Melon Mambo
Accessories: Black satin Ribbon, Sticky Strip, Rhinestones, Hest Tool, Aqua Painter, Black Embossing Powder, Dimensionals


Thanks for looking,

Have a great Sunday
Dani

Wednesday, October 6, 2010

Wedding Flowers

Hi guys,

WOW, I've been quiet. I'm so very sorry about that. I do have a great card to share though so I hope you can forgive me. I made this card a few weeks ago for a friend who got eloped and got married. This was to say Congratulations to the happy couple. I made this card using one of Makeesha's sketches from a few weeks back but didn't get this card up in time. I'm pretty sure I had a chest infection at the time. Anyway here's the card I made for them


I made the flower myself out of retired DSP. These are really fun to make. Here is a tutorial for how to make them. Apart from the flower I also faux suede-d the leaves and embossed on the background. Here's a close up so you can see the detail


Stamp Set: Basic Phrases, Baroque Motifs
Ink: Old Olive, Versamark
Cardstock: Pink Pirouette, Whisper White, Old Olive, Retired DSP
Accessories: Heat Tool, Clear Embossing Powder, Scallop Edge Punch, 1 3/8" Circle Punch, Large Oval Punch, Linen Thread, Bone Folder, Non SU! Button


Thanks for looking, Have a great day

Dani

Wednesday, September 22, 2010

It's Challenge, It's Challenge Time!

If you know Flight of the Conchords at all you'll know what the title is all about!!! But apart from that I got to have a break from busyness today and got to participate in challenges! How exciting. I got a card made the other week for a challenge and just never got it on my blog due to being unwell. So I feel good to have two cards to share today.

The first is The Inkspirations Challenge. This week Makeesha whipped up a colour challenge for us. Here are the colours


I wasn't sure what to do with these. They are great colours but I they were a bit of a challenge, which I suppose is the whole point really. Here's what I came up with


Stamp Set: Fox and Friends
Ink: Basic Grey
Cardstock: Whisper White, Rose Red, So Saffron, So Saffron Prints DSP Stack
Accessories: 1/2" Circle Punch, Dimensionals, So Saffron Brads, Linen Thread


For this card I wanted to use ribbon but didn't have any that I was happy with so I made my own rouged up cardstock. I did this really rough to give it a bit of different dimension. All I did was give it a light scrunch and then fold it roughly until I was happy with it. I then added some linen thread around it for some extra texture.

The next challenge I participated in was Just Add Ink. This week the challenge was Just Add Sympathy. I don't usually like making sympathy cards just because of what they represent. But I do find them easier because you can use alot of different sets. I love doing brayering on my sympathy cards though. I finally got to use one of my new sets, Just Believe. Its really beautiful.


Stamp Set: Just Believe, Teeny Tiny Sentiments
Cardstock: Baja Breeze, Night of Navy, Whisper White
Ink: Versamark, Night of Navy, Baja Breeze, Marina Mist
Accessories: Heat Tool, Clear Embossing Powder, Brayer, Dimensionals, 1 1/4" circle, Post it notes


For this card I embossed the baja background in clear. And also embossed the large image in night of navy and clear embossing. I added the circle punched from a post it note and then brayered adding colours until I got my desired effect. I originally did a sunset and then got a lovely pumpkin pie finger print on the sun so thought it was a sign I should have went with night sky. I am happy with it either way and it was just nice to sit and relax for a few hrs while bubba was at day care.

Thanks for looking!
Dani

Saturday, September 18, 2010

ESAD Blog Hop

I hope you’re ready for the ESAD Big Shot Blog Hop!

Hi Guys today I have the pleasure of participating in my first ever ESAD "Happy New Catalogue" Blog Hope. And we all have lots of ideas for you using your Big Shot Machine.

What is ESAD?

ESAD stands for Extra Special Australasian Demonstrators and it is an online group just for Australian and New Zealand demonstrators for Stampin’
Up!

We so love what we do and not only do we love to share it with our customers, friends, and wonderful blog visitors but we share our love for what we do with each other as Demonstrators. We run swaps,
challenges, tutorials, product know how and cyberstamps and we are always there to help and support each other when its needed.

So if you are a Stampin’ Up! Demonstrator located in Australia or New Zealand then please feel free to click here to join our wonderful group.

Now you've probably arrived here from Ann Gerlach's beautiful Blog. If you haven't don't worry I've included a list of all the participants so you don't get lost.

Today I have a project to show you using a technique I've been dying to try. It's called the Faux Metal Tin Ceiling Technique. If you click the link it'll take you to a video tutorial but it's so super easy and really effective. All you do is emboss a piece of cardstock (great you scraps and off cuts cos you don't see whats underneath) in silver embossing powder. Then repeat this a second time so it's nice and coated. Run the embossed cardstock through your Big Shot Machine with an embossing folder of your choice (I used Vintage Wallpaper as my Finial Press hasn't arrived yet) and then simply punch the embossed bits out with a square punch. It is quiet delicate to get into your punch so you do have to be careful. I made mine into a Christmas Card using a new colour, Cherry Cobbler. It's absolutely DIVINE!!! Now I bet you wanna see the card?? Here it is... Ain't it fab?

Here's a front on shot to show you how shiny it is

Stamp Set: Contempo Christmas, Teeny Tiny Sentiments

Ink: Old Olive, Vera Mark

Cardstock: Cherry Cobbler, Old Olive, Whisper White

Accessories: Ornament Punch, Big Shot, Vintage Wallpaper Embossing Folder, Silver Embossing Powder, Heat Tool, Dimensionals, 1 1/4" Square Punch, NON SU Silver Twine, Word Window Punch

I had planned to have other projects for you but due to a chest infection and a very busy week this didn't eventuate. I apologise profusely!

There will be Blog Candy offered for this blog hop and is open to any Non Demonstrators (Sorry to my demo friends). All you have to do is leave a comment here and on all the other blogs in the hop and then email Leonie Schroder and let her know you have left a comment and you could win lots of different product or projects that we have made on the hop.

Here's a list of all the participants in case you loose your way...

  1. Nikki Sadler - http://www.inkyart.com.au
  2. Angela Purdie - www.kintakards.webs.com
  3. Richelle Fletcher - http://stampinwithrichelle.blogspot.com
  4. Shirley McAvoy - http://stampingelephants.wordpress.com/
  5. Carole Stedman - www.carolestamping.com
  6. Carol-Ann Torrie - http://queen-of-scraps.blogspot.com
  7. Sherylee Tutt - www.stampinup.net/esuite/home/sherylee/blog
  8. clare mcilhatton - www.crafty-cow.com
  9. Andrea Buckland - http://creatingcardswithandrea.blogspot.com/
  10. Susan Joyce - http://www.catsinkcorporated.blogspot.com/
  11. Ann Gerlach - www.discover-ink.blogspot.com
  12. Dani Fender - http://danifender.blogspot.com
  13. Bron Heslop - www.bronheslop.wordpress.com
  14. Charmaine Black - http://www.l-ink-edtopaper.blogspot.com/
  15. Pauline Bennetts - http://paulinebennetts.com/stampede/
  16. Bev Watt - http://stampinovation.blogspot.com/
  17. Vicki Were - http://www.stampinvickistyle.blogspot.com/
  18. Jo Weedon - http://www.scrapandstampin.blogspot.com
  19. Kim Conway - http://kimconwaycards.blogspot.com
  20. Jane Norrish - Http://www.janenorrish.com
  21. Jacinta Argent - http://jacintascreations.blogspot.com
  22. Monique Fielder - http://stamping-with-moni-q.blogspot.com/
  23. Jan McAnulty - http://cardcaperswithjan.wordpress.com

Thanks for looking and I hope you enjoy the hop and get lots of inspiration from our projects

Dani